SENse Flex Mini
Last verified June 20, 2026 · classified April 26, 2026
What it is
Summary
AI-generated from vendor-published content · April 26, 2026
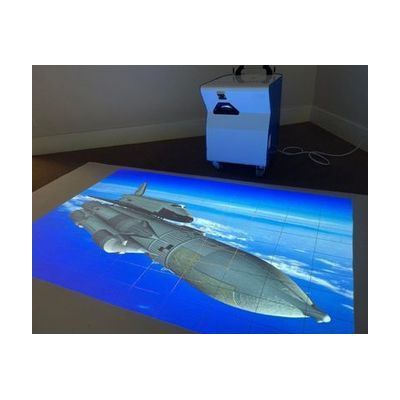
The SENse Flex Mini is a compact, portable floor projection system that casts interactive images onto the ground, allowing users to engage with on-screen content by physically moving, touching, or stepping on the projected display. It's designed for children with complex needs — including those with cognitive, sensory, or physical disabilities — who benefit from whole-body interaction rather than fine motor control required by a mouse or touchscreen. The system includes the projector and interactive components needed to run sessions, but you'll need a compatible device (such as a laptop or tablet) to run the software and content. Be aware that room lighting significantly affects projection visibility, so it works best in dimmer environments, which may limit spontaneous use in bright classrooms.
Quick Facts Catalog facts · auto-generated
- AT Act lending
- Medicaid waiver
- Out of pocket
- School district
What Setup Looks Like
- Out of the box
Position the projector on a stable surface aimed at the floor to project the interactive display. - With a guide
- Connect the SENse Flex Mini to a compatible computer or tablet following the included setup guide.
- Install the accompanying software and load interactive content appropriate for the user.
- Test the projection in the intended space and adjust distance/angle for optimal image size — allow 30–60 minutes for first-time setup.
- See manufacturer support resources for detailed instructions.
- With professional help
- An occupational therapist (OT) or specialist teacher can help select and customize content matched to the user's sensory and cognitive profile.
- An ATP or inclusion specialist can advise on positioning and environmental setup to maximize engagement — typically 1–2 consultations.
Getting it
Try Before You Buy
Devices like this are often available to borrow through your state's AT Act program — typically free or low-cost — so you can try it before buying or pursuing funding.
Where to Get It
Some links may be affiliate links — WhatCanHelp may earn a small commission from purchases at no extra cost to you. More on affiliates →
As an Amazon Associate we earn from qualifying purchases.
How to Fund This
Equipment like this is often pursued through official state programs. These are common starting points — each program decides its own eligibility and what it covers, so the first step is always a phone call.
Compare & explore
Sources & fine print
Vendor facts (name, price, platforms, vendor link) sourced from Inclusive Technology — view on vendor site; last verified June 20, 2026.
Classification & description AI-generated from vendor-published content on April 26, 2026 · confidence: medium. Vendor specs may lag; verify before relying on details in a clinical or funding artifact.